How to setup an email forward?
How to Set Up an Email Forward
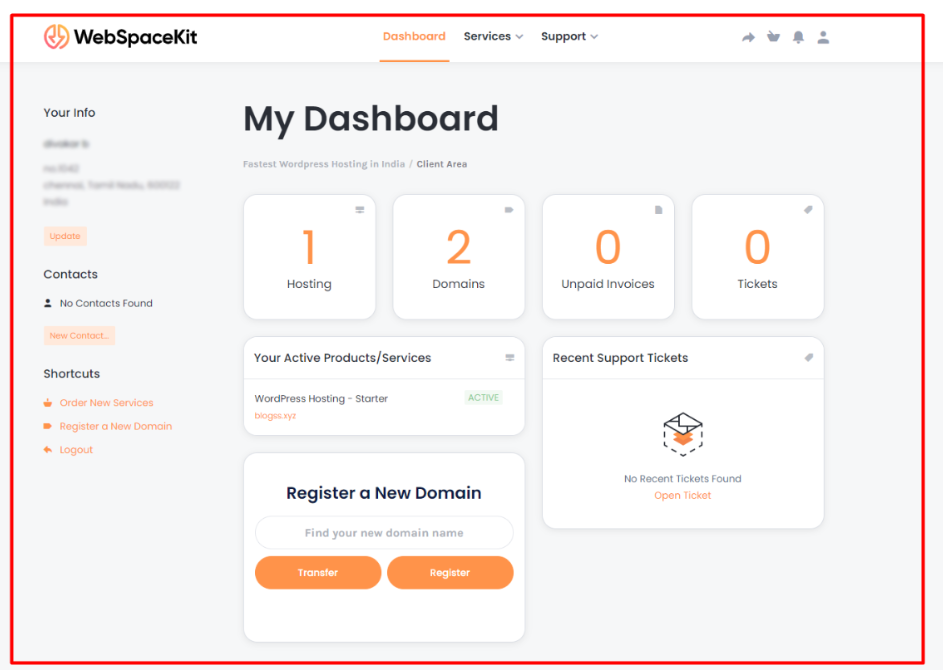
Step 1: Login to WebSpaceKit Dashboard
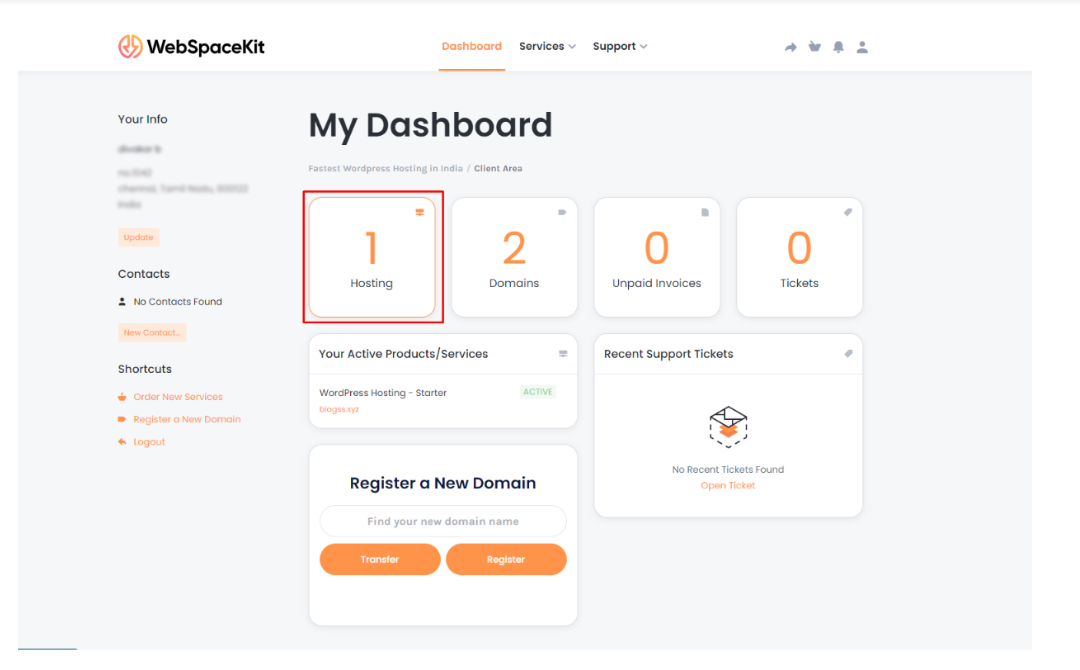
Step 2: Click 'Hosting' in WebSpaceKit Dashboard
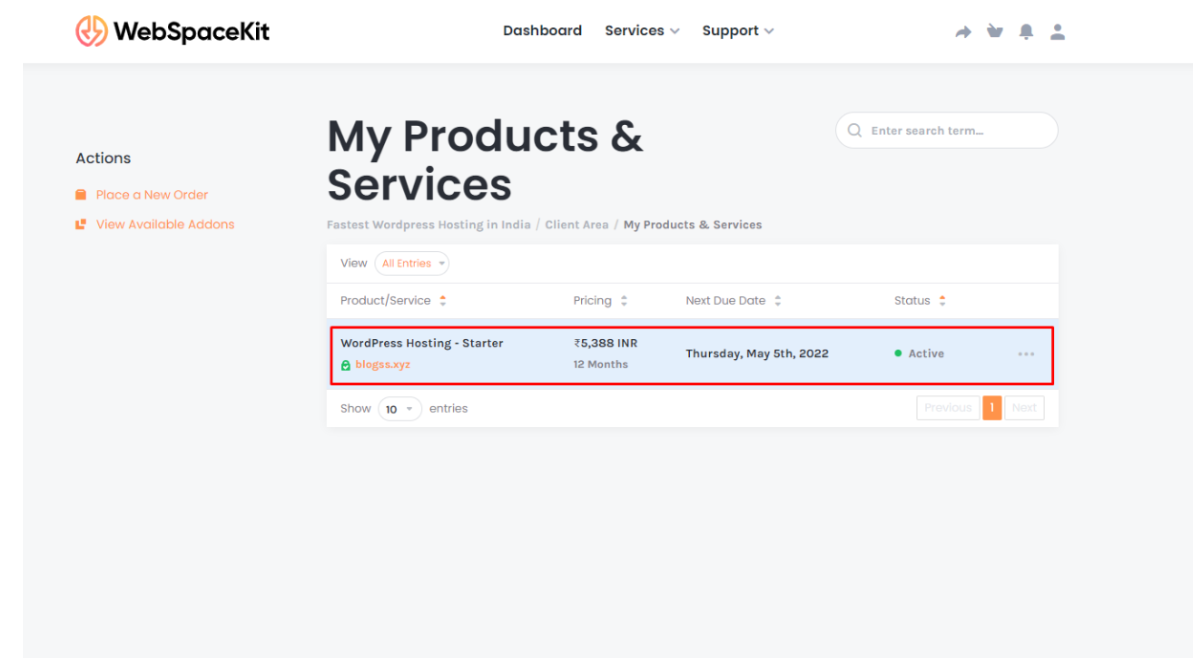
Step 3: Manage Hosting Plan Features
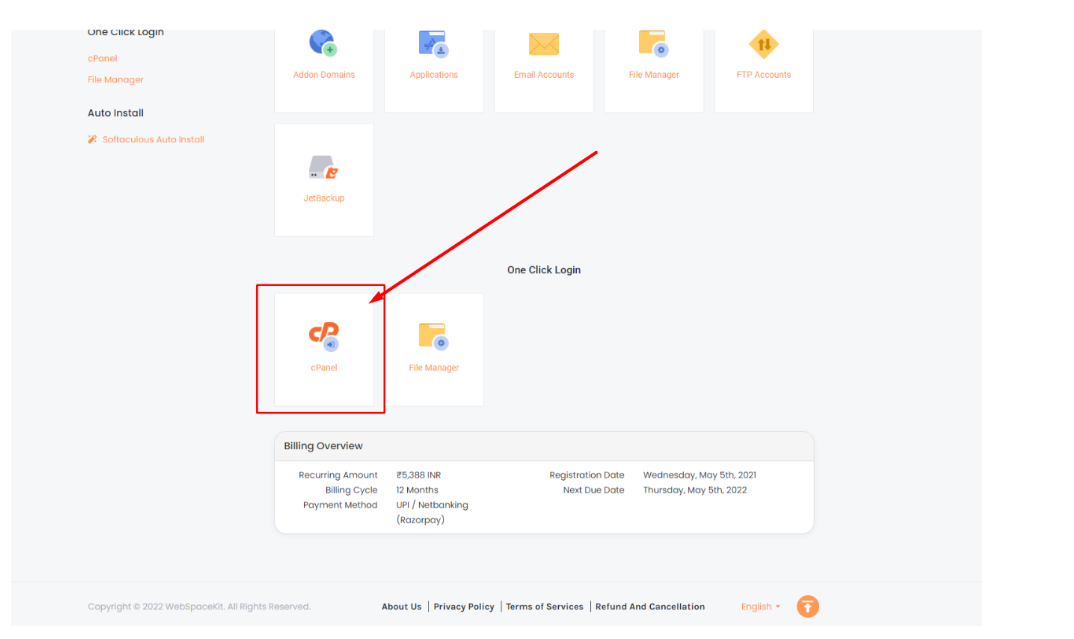
Step 4: Access cPanel Dashboard
- Hosting Manager Page will open.
- Scroll down and click cPanel to log in to your cPanel Dashboard.
Step 5: Find Email Forwarder in cPanel
- cPanel Dashboard will open.
- Scroll down to find 'Email Forwarder' and click on it.
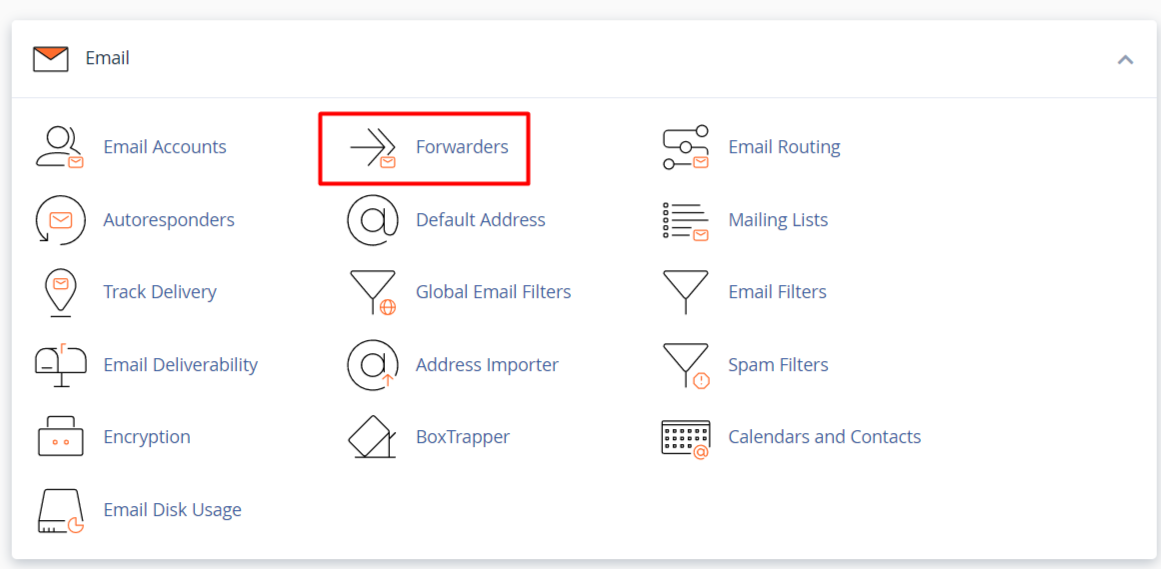
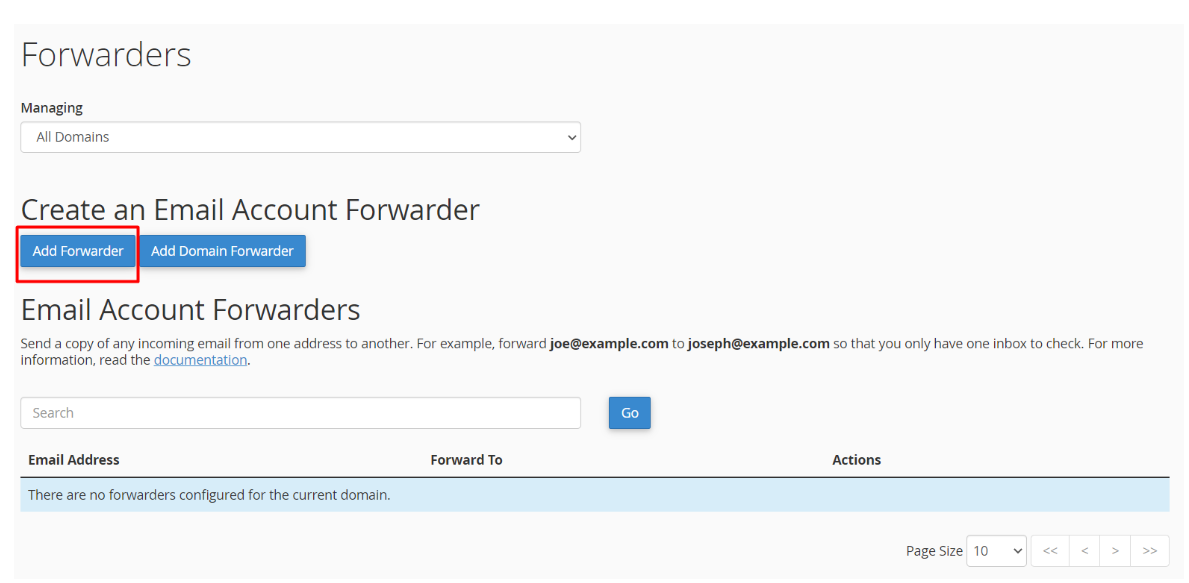
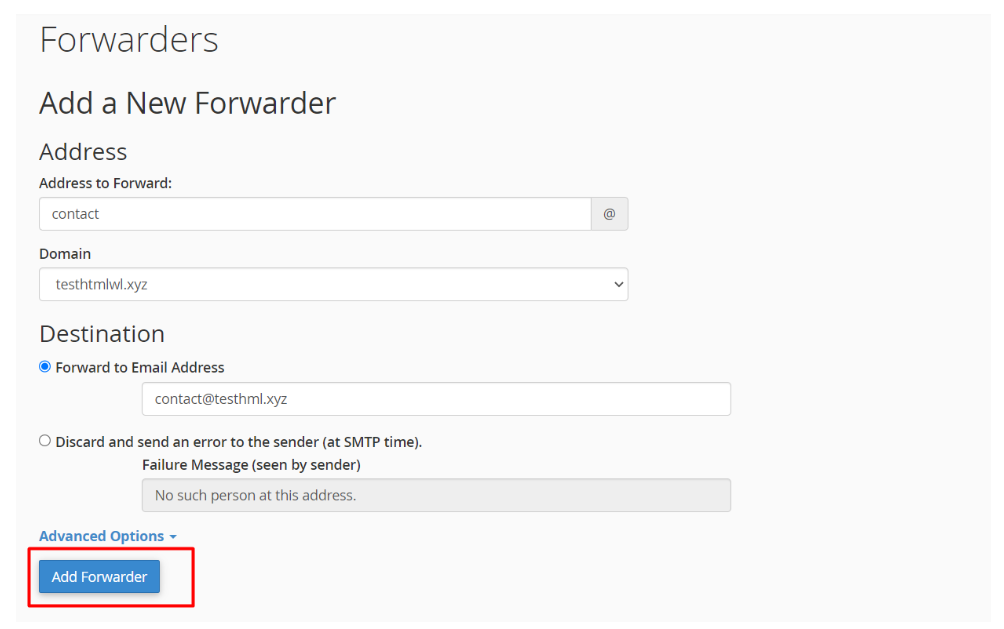
Step 6: Click 'Add Forwarder'
Step 7: Select Domain
- Select the domain from the drop-down box.
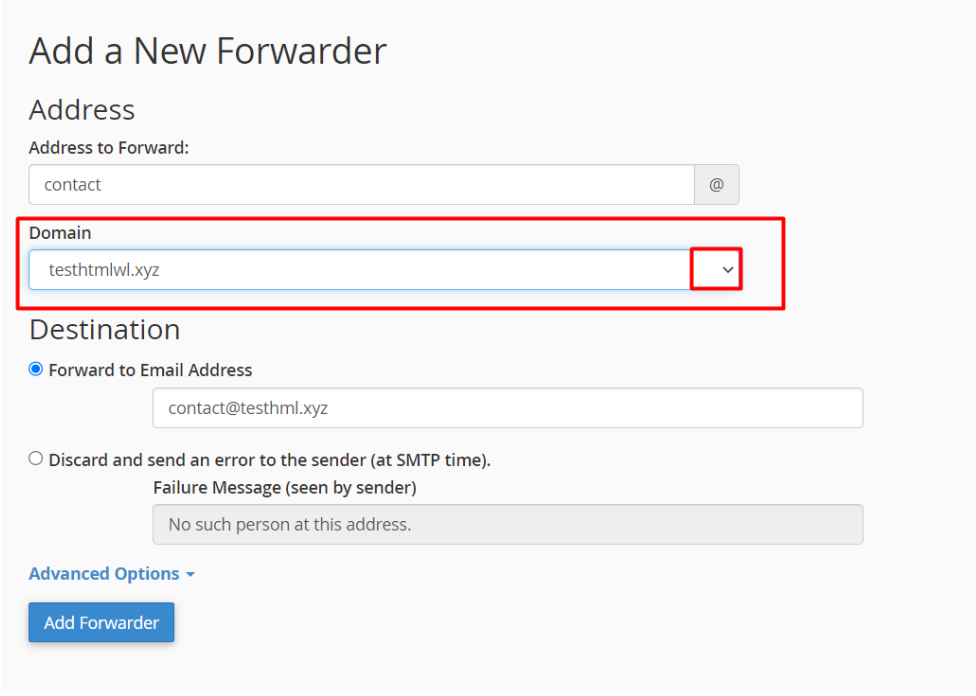
Step 8: Set Destination
- For the Destination option, type the full email address to forward emails to.
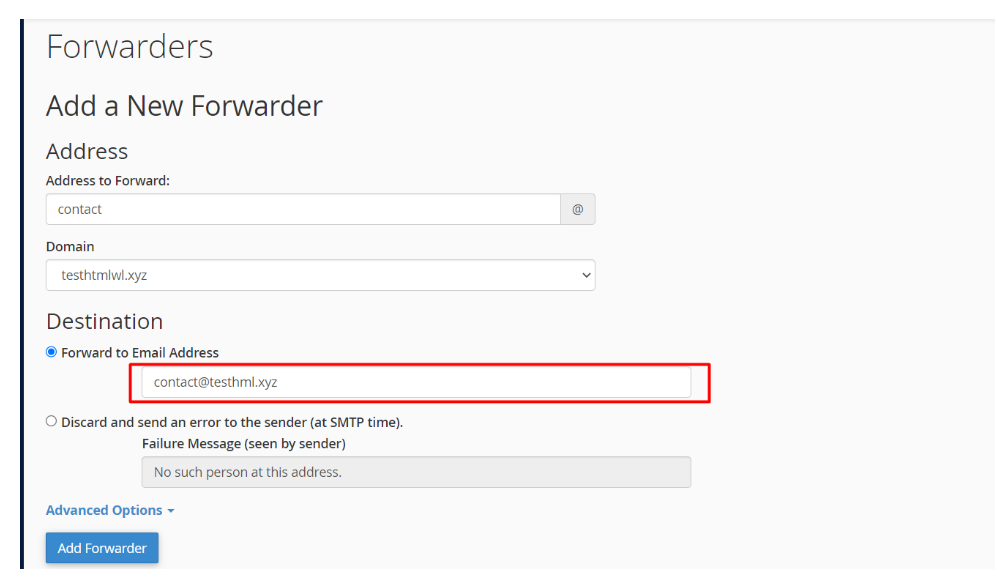
Step 9: Click 'Add Forwarder'
We have now successfully created an email forward in cPanel.
Creating a Forwarder in Webmail
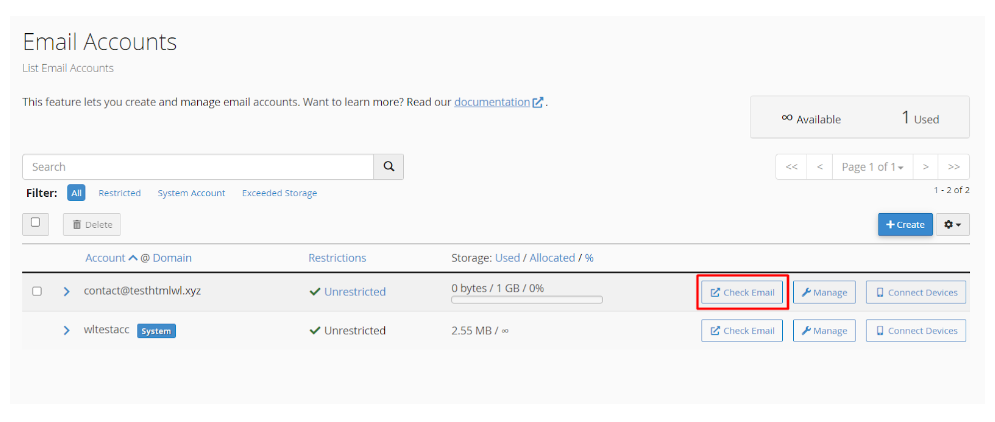
Step 1: Log into Webmail via Cpanel Email Accounts
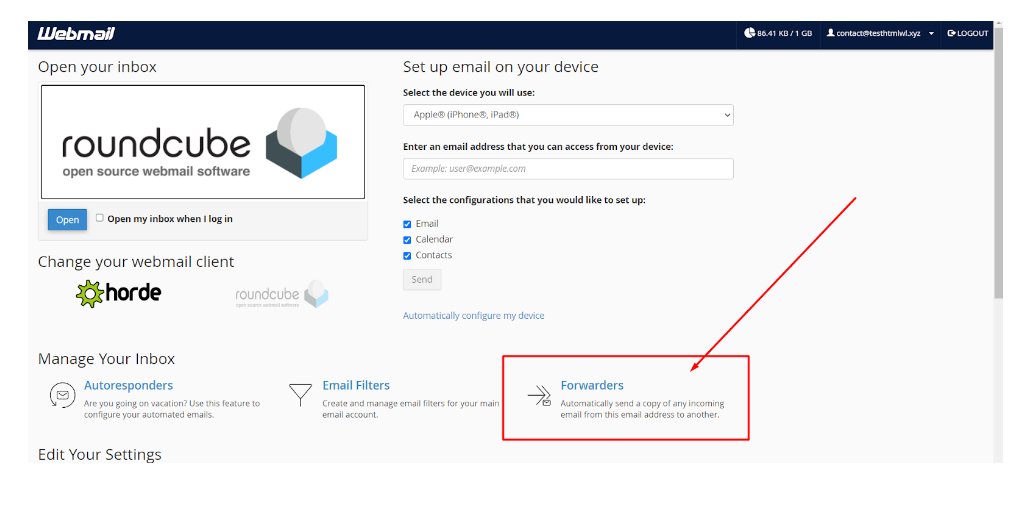
Step 2: Verify and Access Forwarders
- Verify you are logged into the correct email address.
- Click 'Forwarders.'
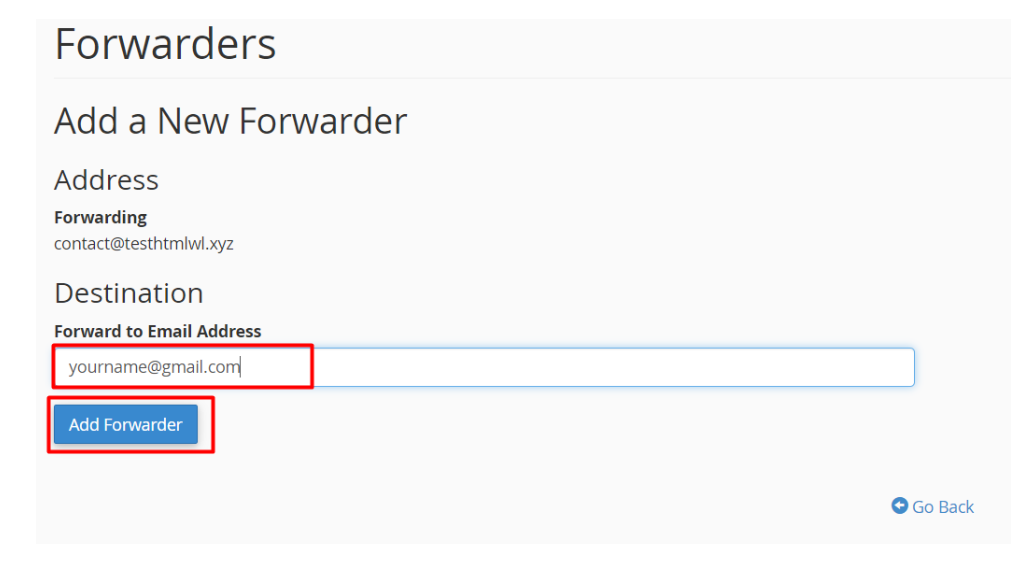
Step 3: Add Forwarder in Webmail
- Click 'Add Forwarder.'
- Fill in the field with the address to forward to.
- Click 'Add Forwarder.'
Step 4: Verify Forwarding Options
- Go back to “forwarding options” and verify that your forwarder is set up properly.

We have now successfully created an email forward in Webmail.
Updated on: 23/11/2023
Thank you!