How to Buy a New Hosting within the Client Area?
Let’s get started!
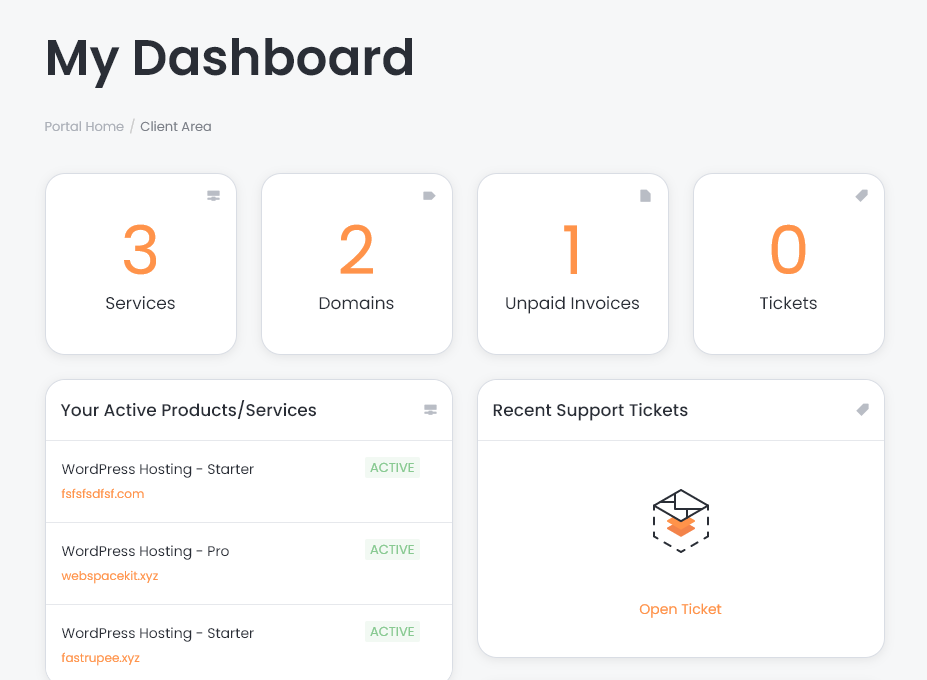
- Go to your Dashboard.
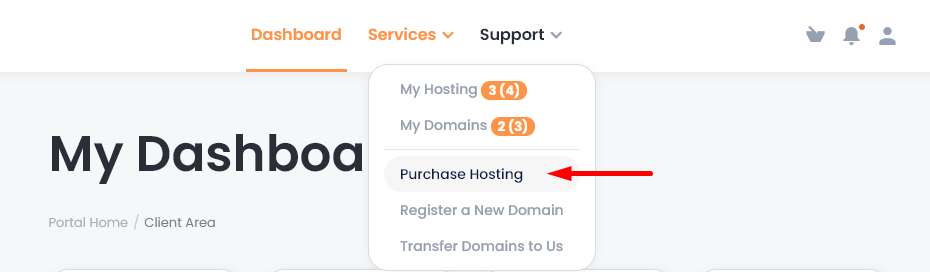
- From the menu, click service > click purchase hosting.
- Choose your plan.
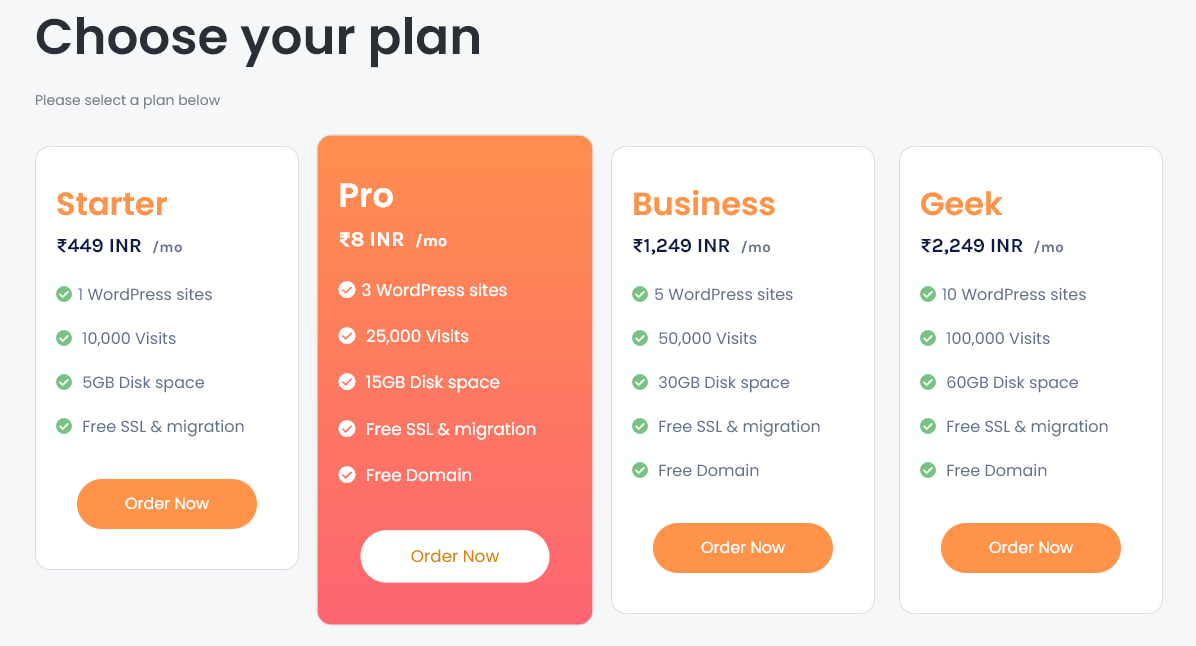
- Click 'order now'.
Note: If you have a domain that is registered in webspacekit or with another registrar, you have to select the 3rd option.
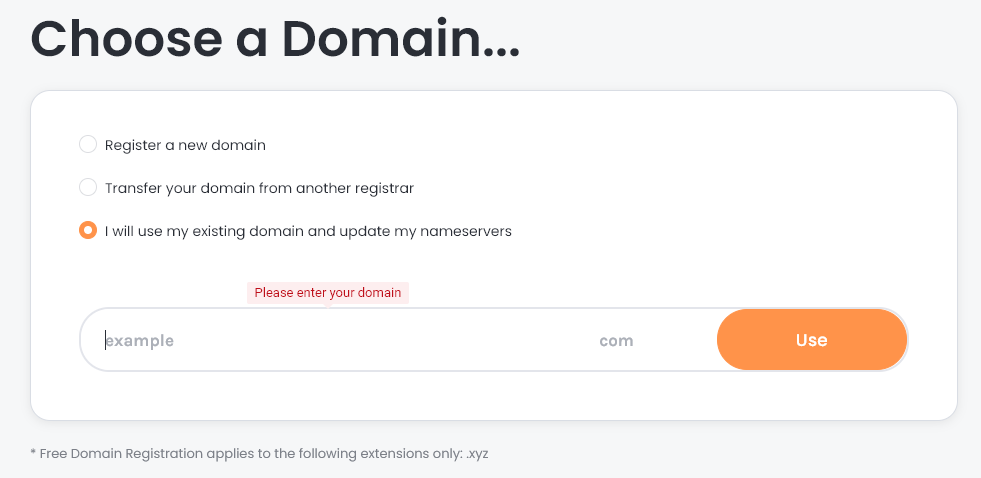
- Enter your domain which you already have and click 'use'.
You will be redirected to the configuration page for customizing your billing cycle and upgrade plans.
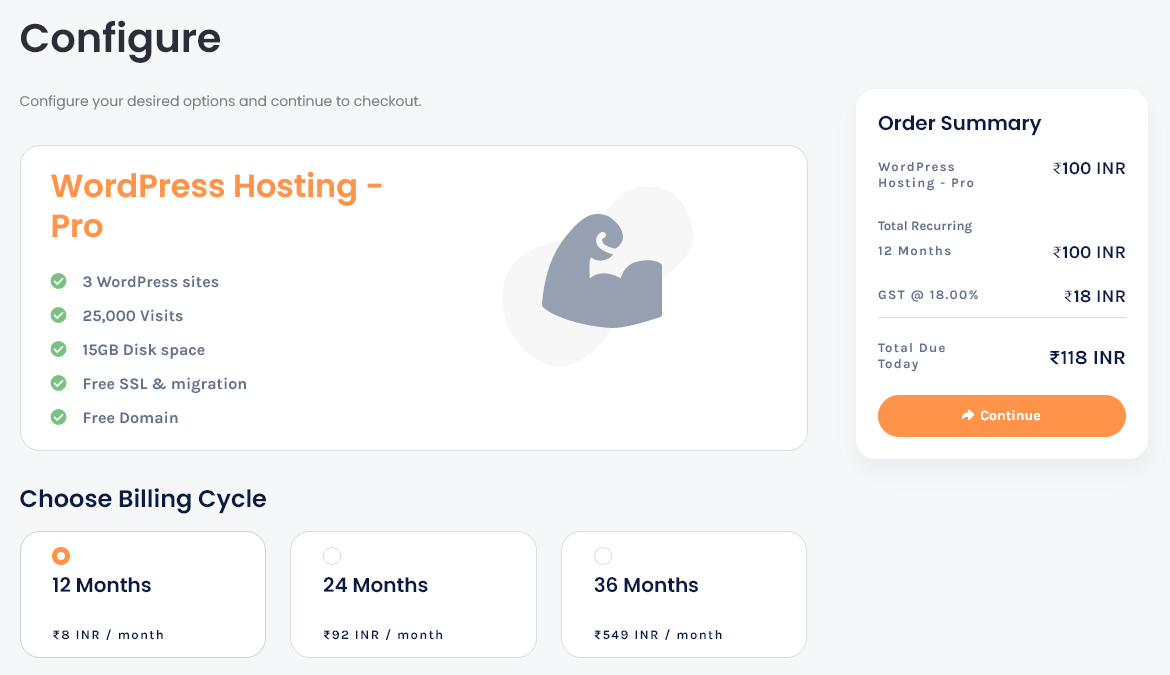
- Click continue.
You will be redirected to the checkout page.
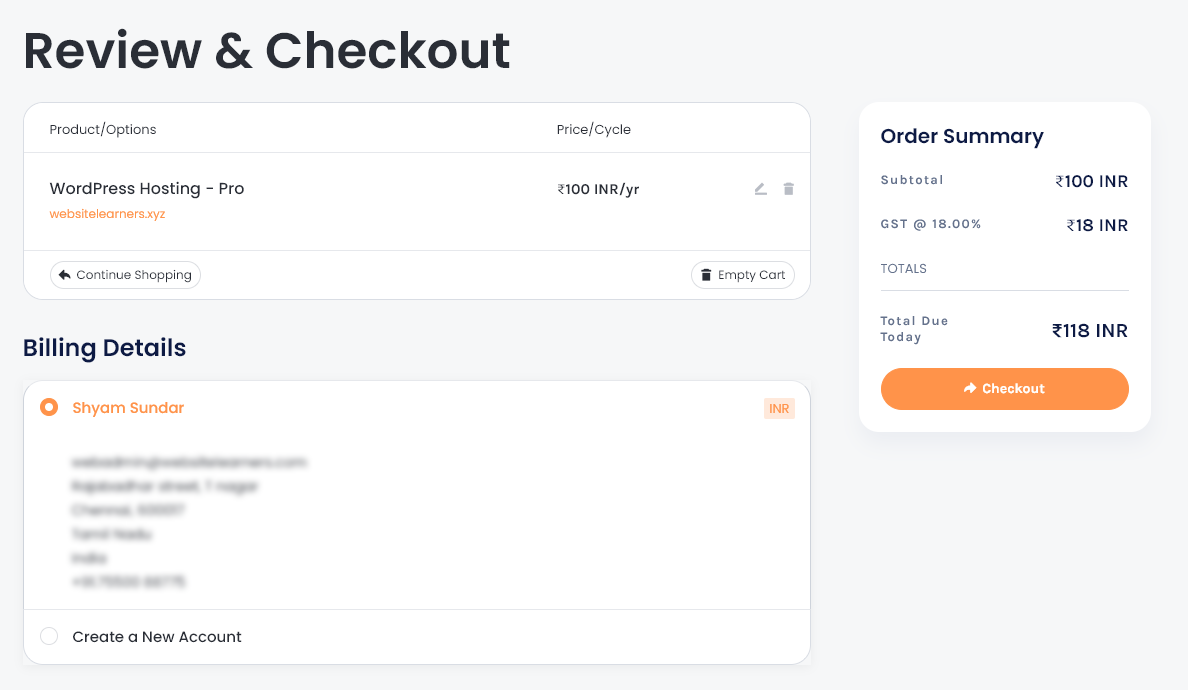
- Select the Billing Details, Payment Method, and Payment Details.
Proceed to checkout.
You will get order confirmation.
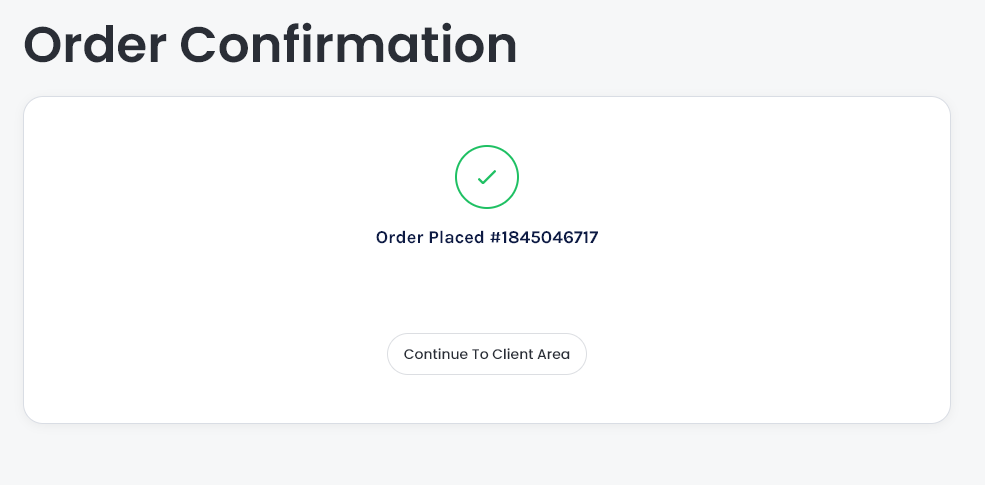
- Click continue to the client area.
You will be redirected to your dashboard for managing your new hosting.
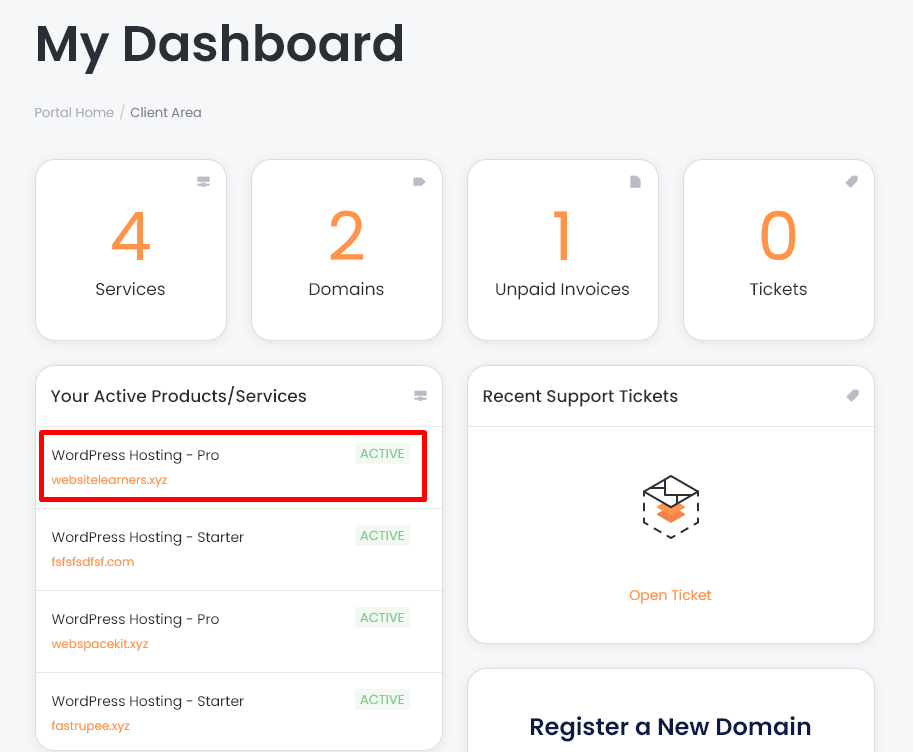
- You can see that our new hosting is listed in the service section.
That's it, you have successfully purchased hosting from webspacekit.
Updated on: 23/11/2023
Thank you!